Wednesday 22 June 2016

Weight Revisited

I haven't said whether it is my weight or the bike's weight I am revisiting.
Which brings me to an important point.
Weight is weight.
You or the bike.
It counts the same.
Anyway, this time it is bike weight.
I managed to get my tools and first aid kit down to what I can get in a little pouch. That filled pouch weighs 600g.
Sounds heavy, right?
Wrong.
It is replacing a pannier weighing 1.5 kg.
Furthermore, removing the pannier from my load requirements means I now no longer need the pannier rack, so that is even more saved.
Anyway, the bike is down to 14.2 kg now.
I reckon I can get food, water and tools down to 5kg.
So that in 19.2 kg plus rider.
Losing the pannier will save me a little wind drag, too!
It is Wednesday evening now, and I am about to go to bed.
Important to get good sleep!

Monday 20 June 2016

My Favourite Training Peaks Features

With Training Peaks, you can get all sorts of charts set up.
This one shows the longest ride I have completed in any given week, going back over the last 6 months.
For folks interested in longer sportives, this sort of information is important.
You can't train for a 5-hour event just by doing "hard" one hour rides!

Catching Up: The Oxford trip I made at the end of February

My "magic pants".
Like cycle shorts, but much smaller
amd thinner.
They are for wearing under
regular clothing.

Tech Corner: Long and Short Cage Derailleurs

This pair of derailleurs are very similar, except ...
the one on the left has a short cage, and the one on the right has a long cage.

Rear view of the same pair of basic derailleurs.
Short cage on the left, long cage on the right
So why have more than one type of derailleur?

Sunday 19 June 2016

I went on a "dry run" for the sportive, and ...

After getting a wet butt while training on Hoppy, I have refitted the front fender (just a 3 bolt job), and made a temporary "training" fender for the rear (the rear fender is a lot more complicated to refit - the "training fender I can just cut off on the morning of the event)/ Hoppy only seems to have one aero "horn" in this picture ...

... because one fell off in training. I guess the aluminium of the
tubes is prone to wear!


Tape and cardboard under the rear carrier
makes an adequate (and fairly effective)
training fender.

Disassemble detached "horn". reassemble, using gorilla glue to "fix it".
I used alignment marks I made on the mount and the tube of the "horn" to ensure I had them lined  up right before I got the glue out.

Wednesday 15 June 2016

Theory and Practice - Part 2 - Weight

In part 1 I looked at aerodynamics in an attempt to explain how I had ridden the same 100km route 40 minutes faster this year than I did last year.
The answers I came up with accounted for 22 minutes and 36 seconds.
Of course, I was using some pretty "approximate" estimation techniques, so we shouldn't get too hung up on the exact numbers.
But it would be fair to suggest that about half of my faster time was accounted for by aerodynamic changes between the two rides.
This time I am looking at weight.
We will look at:
My weight loss
The weight difference between my old and new bike
Any weight differences in the clothes I was wearing
Any weight differences from the water, spares and kit I was carrying on the bike.
First, my weight loss.
As I keep a weight diary (I mentioned this in part 1), I can easily see that for the 2015 ride I weighed 90.6 kg, and this time round I weighed 84.3 kg.
So that is a weight saving of 6.3 kg
My new bike is a touch lighter than the old one, but I magnified the difference by removing the fenders, lights, etc. etc. The gear set I moved from my old bike was lighter than the one supplied with the new bike, too. But the tyres I am using are a bit heavier than the new bike came with - as I Mentioned in part 1, the wheels and tyres are the ones I got off the old bike. Anyway, the old bike weighed 18 kg, and the new one, without fenders etc weighs in at 14.5 kg.
So that is a weight saving of 3.5 kg
playing weight weenies.
the wheel I had on Mermaid last year weighs 1212g,
without tube and tyre

While Hoppy's dynamo hub wheel comes
in at 1666g, 454g (exactly a pound)
heavier. We know which wheel I'll be using
for the sportive!

Hoppy's steel M131 triple chainset weighs 786g for the "drive" side

The aftermarket forged ally drive crank
comes in at 239g lighter!

Moving onto clothes. Last year I wore jeans, a check shirt, and a hi-viz gilet. Being a bit obsessive, I weighed them. Jeans = 806g, shirt = 318g, and hi-viz gilet = 122g. For a total of 1246g, or 1.246 kg.
This year, I wore heavyweight cycling trousers (329g), sports vest (102g), sports T-shirt (149g) and a full-zip, long-sleeve cycling jersey (372g). And shoe covers (103g). The reason I had more layers on this year is was because it was cooler, and rain was predicted (and it did rain on me!). Total weight 1055g.
So the weight saving by wearing the cycle-specific clothing was 191g, even though the cycle trousers are full-length winter ones, and I had 3 layers on my torso including a long-sleeved, full-zip jersey.
Equipment was where I made a conscious effort to save weight. Last year I had quite a few tools, spare clothes, too much water, spare parts, etc. etc. From my notes I can see I had 4 litres of water and 9 kilos of kit, as well as two bike locks (790g combined) for a total weight of c. 13.8 kg.
This year I had three large water bottles (1044g, 835g, and 1074g), a handlebar bag (674g, including 3 bananas), a small top-up bag (747g, including dates, tomatoes, brioches and potatoes), and a rear pannier with a spare jacket, a multi-tool, pump, and some bits and bobs (1945g, all included). So this year I had 6319g of stuff with me.
the "full monty"

vs, the lightweigh set-up

That's a weight saving of about 7.5kg compared with last year, and is the biggest weight saving of the 4 areas I looked at.
Summary of weight changes 2015 to 2016 (savings shown as a minus)
Rider (me!): - 6.3 kg
Bike: - 3.5 kg
Clothes: - 0.2 kg
Food, water - 7.5 kg
Total weight saving: 17.5 kg.
Using a tool like Bike Calculator allows some ball-park estimates to be made.
Rider weight 2015 = Rider + clothes = c. 92 kg
Rider weight 2016 = c. 85.5 kg
That goes in the rider weight on Bike Calculator.
Bike weight 2015 = Bike + kit, water, etc = c. 32 kg
Bike weight 2016 = c. 21 kg.
Ride distance = 100km.
Elevation is about 100m.
Put all the 2015 data in, then slide the red "knob" at the top of the calculator so that time is as close to my actual time on the ride as possible.
Time for 2015 = 5 hrs 20, which is 320 minutes.
Then change the rider and bike weights to the 2016 numbers.
Time comes down to 310 minutes.
So the weight savings save me another 10 minutes.
But wait.
It isn't a flat route.
Even Strava, with it's rounding down methodology says I climbed 850 M on the ride.
So what if we split it into 2 part rides to simulate the hills. First ride gains 850m, the second loses the 850 meters. As the bulk of the hills are in the first half, but fatigue is in the second half, just for convenience we will split the time at 170 mins for the first half and 150 mins for the second half. After all, with all the big hills in the first half, then it probably did take longer.
So let's put the numbers in.
Well, that doesn't work. You can freewheel the second half in 104 minutes.
So let's try 100 minutes for the "downhill half", and that gives us 220 minutes for the uphill half.
1st 50k (850m uphill)
2015 = 220 mins (our starting point)
2016 = 199 mins (from Bike Calculator)
2nd 50k (850m downhill)
2015 = 100 mins (our starting point)
2016 = 107 mins (from Bike Calculator).
Note how for the "downhill" section, the heavy bike was actually quicker.
But the lighter bike(and rider) was much quicker on the first half, to give an overall saving of 14 minutes from the 17.5 kg weight saved.
So that is 22 minutes accounted for by aerodynamics, 14 minutes accounted for by weight, and now I have only to explain the other 4 minutes to make the numbers add up to the 40 minutes I saved "in the real world".
Of further interest, is that weight seems to be worth about 48 seconds per kilo saved at my current levels of performance over that particular 100km course. Time for another diet before the 2017 event, methinks.
Anyway, that's it for this post.
In part three I will look at some other factors that affect the change between my 2015 and 2016 times over this one particular 100km (62 mile) route.

Theory and Practice - Part 1 - Aero

Theory and Practice (and feedback for theory that leads to the next practice, and so on).
In 2015, I rode in the local charity sportive, the 100km (62 mile) Tour de Vale.
I have entered again, and I am due to ride in about 10 days time.
Like a lot of folks, I am looking to get a bit better time this year, compared with last year.
Strava can be a useful measuring device for comparing performances, especially over out-and-back routes where the wind direction won't make a ride very fast one day, and very slow the next.
The Tour de Vale is basically a circular route heading out of town, then going in a big anti-clockwise (left-handed) loop until it eventually reaches the road it left town on, when it turns back into town for the finish.
The event has proper "official" times generated by a little microchip on the back of the entrant's number being picked up at the start/finish.
But the start/finish point spends much of the time being locked away, so it is hard to compare practice runs with the real event, because you can't actually do the bit at the start and the end, except on event days.
That's where Strava steps in.
A couple of segments have been set up.
One starts just outside the stadium gates, and is the closest you can usually get to the start. The other segment starts at the road junction where the road to the stadium meets the main road. The second segment saves having to cycle right down to the stadium gates, then back out again just to practice.
However, because I always approach the stadium from the side, I have to go very near to the gates anyway, so it is the first segemnt I will be looking at in this article.
So, here are my two times on that route:
1) last year's actual event time: 5hrs 20 mins 10 secs.
2) practice run last Sunday: 4hrs 40 mins 1 second.
For comparison, my "official" event time last year was 5 hrs 22 mins and some seconds. The "extra time" over the Strava segment is the bit from the stadium gates to the start/finish line!
So how did I knock 40 minutes off my time?
Well, a number of things changed:
1) I lost weight
2) I changed bikes
3) the weather was a few degrees cooler
4) I wore different clothes
5) I rode in a different position
6) I carried less stuff with me on the bike
7) My level of fitness may have been different.
For this first posting, I will mainly look at aero.
So let's look at all those things in turn:
1) Weight loss. Because I keep a weight diary, I can easily look up how heavy I was on the morning of my 2015 ride: I weighed in at 90.6 kg (199.3 lbs). Last Sunday I was 84.3 kg (185.5 lbs). So I weighed 6.3 kg (13.8 lbs) lighter.
2) Different bike. Last year I rode Mermaid, which weighed in at 18kg (39.6 lbs), while this year I rode Hoppy, which weighed in (stripped down as previously mentioned) 14.5 kg (31.9 kg). So that's another 3.5 kg (7.7 lbs) saved in weight.
But what about different gearing and tyres?
It just so happens that I moved various parts from Mermaid to Hoppy.
So in both cases I used the same Spa Cycles forged 175mm triple cranks, running the same 48,32,26 rings. The BB was the same Strongly aluminium unit. The rear gears were the same SRAM PG850 11-32 cassette. The front and rear wheels where the same, too, sporting the same tyres (no-name hubs laced to Mach 1 240 rims, bearing 37x622 Marathon Plus tyres).
So the main thing to look at here is the weight saving.
3) Weather was a bit cooler. Hard to quantify, really. I needed a bit less water this, but I brought some back, so I still ended up carrying a similar amount of water all round the route.
4) I wore different clothes. Last time, I wore a pair of black jeans, a check shirt and a hi-viz gilet. This time I wore heavyweight cycle trousers, a long-sleeve cycle jersey, and I taped over the three central vents on my helmet for some #GhettoAero
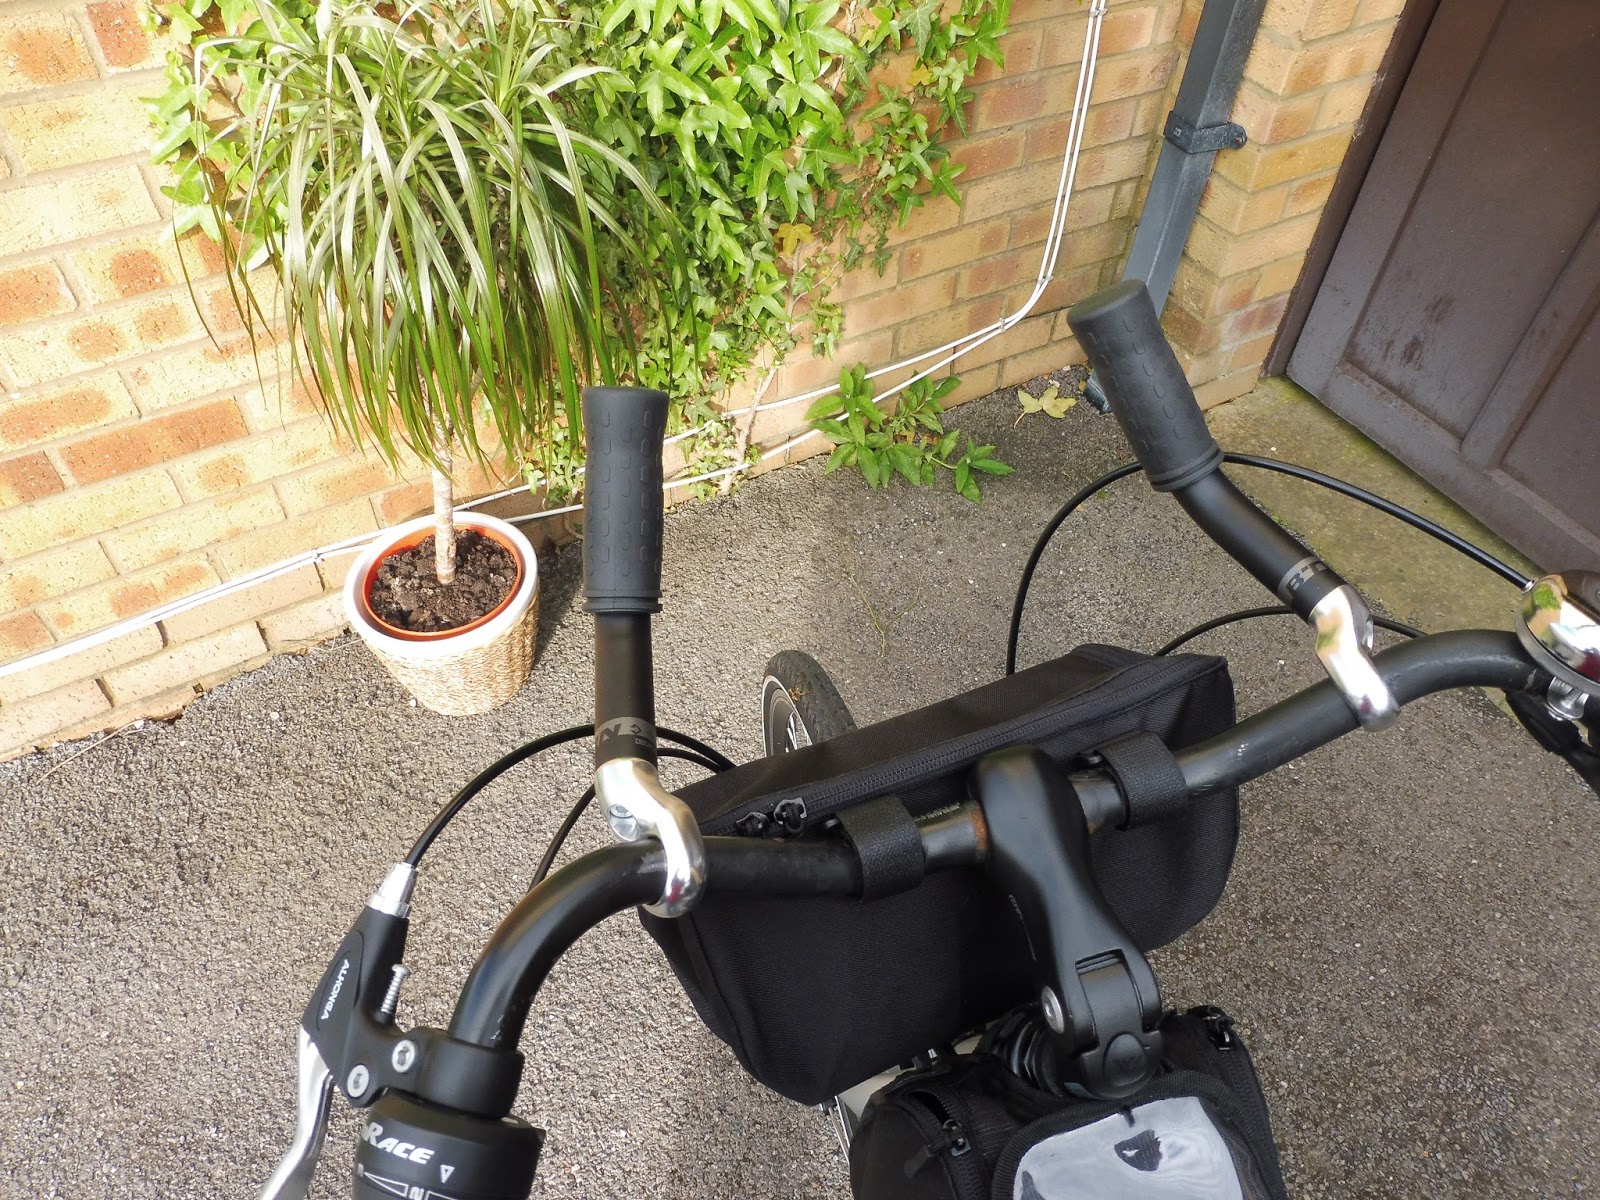
5) I rode in a different position. I fitted some aero "horns" to my handlebars. The actual 'bars themselves were the set I took of Mermaid, so they are the same. But this time I spent a lot of time in a more tucked-in riding position.
6) I carried less stuff. Last year I pretty much took the kitchen sink. Covered all eventualities, except, perhaps, a zombie apocalypse. This year, I stripped the kit right down, for more weight savings.
7) Different fitness levels? This one is hard for me to quantify -I was trying reasonably well until Easter, then it all fell apart. So I don't think I am much more trained that last year, when I was running more, and going on a lot of medium length rides.
Well that's a narrative account.
So how will I try an analyse things?
Specialized have done a series of wind tunnel videos that are useful, so let's start with this one:
https://youtu.be/MSAHa8brcCM
This one looks at riding at 50 kph (a touch over 30 mph), and riding at 20 kph (about 12 1/2 mph). While fitter riders might get closer to the 50 kph mark, a little math shows that to get round 100km in 5 hours results in an average of 20 kph. So I ride more in the 20 to 30 kph range, dropping lower on hills.
And watch this one, too:
https://youtu.be/O-7g1kqYJAY
It explains why aero still matters for a slower rider like me ...
So Specialized have a variety of videos that relate to my riding.
Their favourite metric is "time saved over 40km" (25 miles).
Since I am looking at a 100km Strava segment, I will simply multiply Specialized's savings by 2 1/2.
Tighter fitting clothes for 2016. Still a bit loose in the bosy, but not as loose as last year's shirt.
I got my wife to tighten the wrists of my jersey a bit so they were a tighter fit.
(I have to order a bit big, because I have long arms!)
Next year, I'll see about taking some of the "slack" out of the body and sleeves of the jersey.
https://youtu.be/4ReDmvjailA
This video looks at wearing "baggies" over lycra.
My outfit last year was at least as "baggy" as the one shown, and while my lycra isn't "racer cut", it is reasonably form fitting.
In the video, they use the metric of time saved over 20km, and find it works out at 70 seconds. So scaling that up to my 100 km ride suggests that just changing my outfit saved me a massive 350 seconds.
THAT'S NEARLY SIX MINUTES SAVED, just by wearing different clothing.
WOW !!!
Reasonably close fitting trousers, and shoe covers, for 2016

https://youtu.be/bTiyl79dTsg
This one looks at helmets.
40 seconds (over 40km) saved by moving from a Prevail to an Evade, and a further 20 seconds saved by wearing a TT helmet.
My "Ghetto Aero" helmet is unlikely to be as good as the purpose-designed Evade, but equally well, my unmodified helmet may not have been as good as a Prevail to begin with.
It stands to reason though, that taping over 60% of the vents in the front of a helmet will improve the aero, so I'll just guess at the 40 second figure, which, when multiplied up gives me 100 seconds for the 100 km event.
You can see the tape on my helmet above. Overheating might be a problem in some places, but it was nice and cool here for both the practice and the "real thing".

https://youtu.be/jfKCZsOrYOw
This video looks at aero and panniers.
Last year, I had no bottle cages, so I carried some water bottles in my front shopping basket, with extra water and a LOT of spare kit (that I never used!) in two rear panniers.
So, counting the front basket as a pannier (it is a 20 litre fabric-sided basket!), that makes three panniers for the 2015 time.
For 2016, I had 3 litre handlebar bag, a small 2 litre top-tube bag, and a half-empty pannier at the back. So call it one pannier.
So I ditched 2 panniers worth of drag.
Using what the chaps at Specialized reckon the loss for one pannier over 40 km is (about 120 seconds!), scaling up for 2 panniers over 100 km gives 600 seconds. TEN MINUTES!!!
While I am still talking about aero, what about my altered riding position?
https://youtu.be/9rvJ-6Cgnz8
This video looks at 4 positions - tops, hoods, drops, and tuck.
Last year I reckon I was using the equivalent of "tops". This year, I have the bars further forwards, and a touch lower, so I reckon my "standard" position is probably "hoods" now.
My other position is on my aero horns, with my forearms fairly flat. It is a good bit lower than my standard position. But it doesn't look anywhere near as good as the guy in the video. So I will call it as "drops". But I can't stay in my "low" position for the entire time - I can't drink down there, steering is harder, and the shifters and brakes are on the "standard" set up. Can't eat or drink down their either! But I was down there quite a bit.
So, as a pragmatic step, I'm going to assume that last year I was using the equivalent of "top", and this year I used "hoods" 50% of the time, and "drops" the other 50%.
Specialized reckon that (vs tops) hoods is worth 90s over 40k, and that drops is worth a further 65s over 40k. So scaling up to 100km gives 306 seconds.
How about the bike? Is it more aero?
Nope. Large diameter aluminum tubes this year, while last year was slightly smaller diameter steel tubes. The riding position I have set up is lower, but I have already looked at that under the aerodynamic analysis.
As I mentioned above, I am using wheels, tyres, and gears taken from my previous bike, so that are the same.
Summary of savings from aero:
1) Weight loss: hard to quantify - small.
2) New bike: hard to quantify - likely small
3) Weather: hard to quantify - small
4) Clothes: 350s (clothes) + 100s (helmet)
5) Riding position: 306s
6) Water and equipment: 600s (panniers+basket)
7) Fitness: hard to quantify
Total aero gains (over 100km) is therefore:
350s + 100s + 306s + 600s
Which equals 1356 seconds.
22 minutes 36 seconds.
That goes a good way towards explaining the drop in my time of 40 minutes!
I am surprised that the biggest element came out as the basket and panniers. I will be try to do without that remaining rear pannier for the actual event, and perhaps save another 100s (I will still have the small bar bag and/or top tube bag in the airflow!) or so by doing so. Or I will strap it to the top of the rack and save about 45 seconds (according to the Specialized video I linked to above).
Next time I will look at weight!

Sunday 12 June 2016

Converting a bike from 7-speed freewheel to 8-speed freehub

Just done this on Hoppy, my BTwin Hoprider 300.
Pretty easy, really.
You need:
1) a wheel with a freehub designed for 8+ speeds (on 11-speed freehub you also need a spacer to put behind the cassette, otherwise there will be a gap between the cassette and the locknut, and the gears will move about!). I'm using the 8-speed freehub wheel I retrofitted to Mermaid (my previous bike, that I stripped for parts). You could just take the wheel apart and change the hub, then relace the wheel, but if you have to think about it, you'd be better buying a new wheel with a freehub already fitted!
2) an 8-speed shifter. The spacing is different for 7-speed and 8-speed (8-speed gears are slightly closer together). I'm using the 8-speed SRAM TwistGrip shifter I retrofitted to Mermaid
3) an 8-speed cassette to suit your freehub (modern Shimano and Modern SRAM use the same standards, but Campagnolo is a law unto itself. There are no 8-speed Campagnolo groupsets currently available, though, so really if you want to go Campy, go for 9+ gears). The SRAM PG-850 11-32 I retrofitted to Mermaid for me!
4) an 8-speed compatible derailleur. It may be your 7-speed one will work, once you adjust the cable tension and the high and low stops. It did for me, because Hoppy came with a Shimano Altus rear mech. Looks like the M310 model, which is listed as being 7 and 8 speed.
5) An 8-speed chain. Again, your existing chain may be good enough. 8-speed chains have flatter ends on the links than 6-speed chains (the flatter end are so that the chain clears the slightly closer together gears sprockets). But the plates are the same size. Gear teeth are also the same thickness. For me, the same chain did the job. If your chain has much wear on it, now would be a good time to replace it, but my chain has very few miles on it, so I am keeping on.
Method.
1) Replace the shifter.
2) Feed the cable through (look at where the "old cable" went to get the routing right.
3) Undo/release brakes (if required). You'll never get a fat tyre past the pads on a v-brake!
4) Swap the "old" back wheel for the "new" one, popping the chain over
5) Do the wheel up properly!
6) Check, and adjust the rear brake (I put it here, rather than at the end, so that you don't forget to do it!)
7) Tighten the cable onto the cable clamp on the derailleur.
8) Try, carefully, going through the gears. Do this on a stand or by lifting the rear wheel a bit - NOT while riding it. If switching from a 7-speed to an 8-speed, the chain is unlikely to fall off the "inside", it do it gently, just in case.
9) Adjust the chain tension. The derailleur didn't move out of 8th gear when I moved the twist grip to 6th gear, and didn't get to 1st gear at all. Using the tensioner (essentially taking a bit of slack out of the cable) fixed this. You could also adjust the cable clamp if it is a larger amount you want to correct. If the chain tensioner won't go far enough in or out for what you want, then it will definitely be a cable clamp adjustment on the derailleur.
10) Adjust the high and low stops as appropriate. For me the chain was making a noise in the highest gear (the smallest cog). Moving behind the bike made it easy to see that the derailleur was going a bit past the 8th gear. So I adjusted the "high" stop so that the derailleur was directly below the smallest cog when the shifter was set to 8th gear. Similarly, I had to move the low stop out a bit, because the chain was a bit reluctant to change into 1st gear. Again, from behind, I lined up the derailleur so that the chain path was directly below the first gear.
11) Repeat 8, 9, and 10 as required. You should only have to do step 9 once, but if you didn't make a good job of it you may have to repeat it.
12) Check everything is done up properly, and no cable end are flapping about. You should really cut them and fit a cable end, but I tend to just tap then to a convenient chainstay or such like, so that if I am tinkering about, I have the whole cable length, and a "good" cable end to work with.

Saturday 11 June 2016

Hoppy goes on a diet

Hoppy on a diet. Front mudguard gone, many other bits to follow!

In two weeks I have a 100km charity sportive.
So it is time I put Hoppy on a diet.

The math shows that my time for the sportive will drop by about 1 minute for every kilo (2.2 lbs) of weight lost. (Update: A later calculation suggests that the time saving over the 100km route will be about 48 seconds per kilo lost)

Off my fat butt, I am down about 6 kilos (13.2 lbs) on this time last year.
(And I am about 12 kg / 26.2 lbs down on my weight for January 1st 2015, which is when I started my diet).
So that's 6 minutes saved!

My previous bike weighed in at a rather sedate 18kg (almost 40lbs,)
The Hoprider 300 weighs (according to Decathlon, the place that sells them!), 15.6 kg for a "medium,".
Well, my Hoprider 300 is an "extra large", so is going to weigh in heavier than that! More like 16.5kg.

So I put Hoppy on a diet.
Off came the mudguards (fenders)
Front fender and fittings weigh 230g

Rear fender (and fittings) weigh in at 291g

Off came the kick stand.
182g for the kickstand

Off came the lights.
107g for the front light ...

... and 74g for the rear

Off came the dynamo wheel, and on went the wheel I had on Mermaid, saving 454g just for that change!
The wheel from mermaid weighs 1212g ...

The dynamo wheel that comes with the bike weighs 1666g.

On went some super-heavy (and super-reliable) Marathon Plus tyres - at 791g each, they weighed 124g MORE than the tyres supplied with Hoppy. But the Marathon Plus have less of a tread pattern than the Innova tyres (supplied with the bike), and the Schwalbes have a reputation for great puncture resistance combined with medium rolling resistance. Not good. Medium.

On went an 8-speed cassette, to replace the 7-speed freewheel. the SRAM PG850 has quite a few cutouts and quite a bit of drilling, so is not as heavy as it looks, and Mermaid's old back wheel with the PG850 gears actually weighed in at 38g LESS than the 7-speed wheel and cassette that came the Hoprider.

Off came the rather heavy Shimano M131 crankset (steel rings, cast cranks), and on went my forged alloy crankset, with an alloy "big ring".

The Shimano M131 48/38/28 is rather heavy ...

Less steel more alloy. Even with a steel middle and inner ring, the Spa Cycles forged set comes in 239g lighter
(rings are 48/34/26, 'cos that;s what I like, and unlike the Shimano unit, the rings are removeable, so you can have pretty much what you want for the ratios.)

The cast ally Shimano M131 weighs in ...
(it is a 170 mm crank)

 ... again lighter (11g), the Spa Cycles forged 175 crank arm I now have on Hoppy.
Longer cranks, but lighter. Hmm.
Forged is better than cast, that's why!

Which crank bolts to use?
I had this (new) pair from Stronglight in my "bits" box ...

... although at only a single gram heavier, the bolts and covers supplied by BTwin are much the same weight.
I fitted the Stronglight ones because they have a "allen" head, while the BTwin ones need a thinwall 14mm socket or a T40 torx bit - yep that surprised me as well - they are 14mm bolts with a torx socket cut into the hex heads of the bolt!
I even swapped the BB for a lightweight aluminium Stronglight item.
Turns out the "original" has a lot of plastic in it, so the BBs weigh about the same, but the new crankset saves about 250g, half-a-pound, even though the old one had 170 cranks and the new one has 175s.
The plastic-cupped BB from BTwin compares favourably for weight with ...

... a Stronglight aluminium-cupped unit.
Oh, and I have 3 water bottle cages, too.
Anyway, in the end, I got Hoppy down to 14.5 kg.

And that is with Marathon Plus tyres (pretty much the heaviest touring tyre available), and heavy duty wheels.
If I splashed out on, say, something as simple as a pair of Campagnolo Khamsin wheels and a pair of Schwalbe One tyres, I could get the weight down to closer to 13kg.
Even simpler, leaving off the luggage rack saves about a kilo too!
So Happy could get down to 12kg or so without breaking the bank.

But as we are, Hoppy is down to about 14.5 kg (a little over 32 lbs)
So that is 3.5 kg (7.7 lbs) less than Mermaid was.

So that is another 3 minutes saved.
I'm going to be carrying less stuff this year. Last year I pretty much took the kitchen sink. Useful if a zombie apocalypse breaks out during the sportive, but not exactly light, or likely to be needed.
So I am hoping to save a 2 or 3 kilos (4.4 to 6.6 lbs) on "stuff".
So that'll be another couple of minutes saved.
Then there is the "aero". My clothes are a lot closer fitting this year, and I have my aero "horns", too. I can get my position lower, and save a bit there, too. Should be good for five to ten minutes off my time.
So what do we have?
6 minutes saved from my weight loss
3.5 minutes saved on the bike weight.
3 minutes saved on tools and "stuff"
5 to 10 minutes on aero.
So 17 to 22 minutes then.
Better keep my head tucked in - 22 minutes is what I was looking for to get my time down to 5 hours.

Update:
On the "test run" I actually knocked 40 minutes off my time.
I have done a more thorough analysis of both the saving from better aerodynamics and less weight.